
Beading Market
Shop for beadwork made by your fellow beaders at the 3D-Beading.com Beading Market!


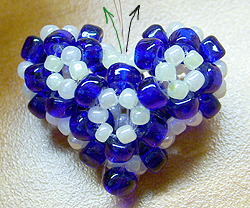
Welcome to the 3-D beaded rounded heart pattern instructions! If you have any difficulty following this tutorial, please post a comment at the bottom of the page on which you are stuck, and I'll do my best to help!
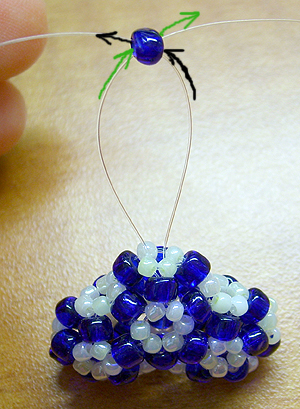
Step 1 : Now flip your heart upside-down and add the very last bead of the pattern! Add a large blue seed bead to one end of the fishing line (either end) and then cross it with the other end of the fishing line, as shown in the picture.
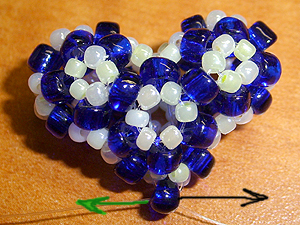
Step 2 : And this is what it should look like when you pull the ends of fishing line tight! Don't you wish all steps were this easy? Ain't she a beaut! You're so close to finishing!
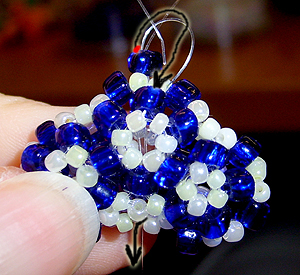
Step 3 : Now we could stop here (it's already a heart) but it's a bit funny looking with fishing line coming out of its butt. So we want to now take those fishing line ends and string them BACK UP to the top of the model again! (so you can hang it or wear it as a pendant or a key chain or attach a brooch backing to it). It doesn't really matter through which hole you take them back up. Just try to hide them as much as possible.
Step 4 : And here's the finished product!!!!!!!!!! Really really we're actually done! Now if you want to wear it as a pendant, you can go ahead and tie a metal ring onto the top of the heart via making several knots around it with the two ends of the fishing line (the more knots, the more secure). Security is important, because if the fishing line breaks or the knot gets undone at the very end, all the beads in the whole model could eventually unravel since they are all on the same piece of fishing line (or 2 if you had to stop one string and start a new one at some point if you ran out of string). If you ever do run into a potential unravelling problem, where the fishing line breaks (rare but if very old can happen), you can stop the damage by removing the last few beads to get some slack on the fishing line ends, then tie them together several times and string them through several other random beads on the model for security. Then cut off the ends that are left sticking out and start a new piece of fishing line to put back the beads that were lost, then tie off that piece by the same method when you've put back all the missing beads. Your repair piece of fishing line (the fresh one) can be short because you're only adding a few beads to it. But make sure it's long enough to be able to tie a knot as well as string it through some random beads to secure/hide it.
As for the metal ring, after you make your knots to tie it down, do the same thing as above, ie run the ends of the fishing line through random beads on the model to secure/hide them, then cut off the loose ends.
If you want to have a brooch backing, I don't recommend glue (I don't trust it). If you want to use glue, use it in combination with tying the brooch backing to your model using none other than fishing line. It might be a bit messy but who's looking at the back of your model when it's against your clothes? Just make several loops between the holes in the brooch backing and going through random beads on the back of your model and back again to the brooch hole, etc etc. Then add glue as desired for an ultra-secure hold. Okay, now you're done! Enjoy!
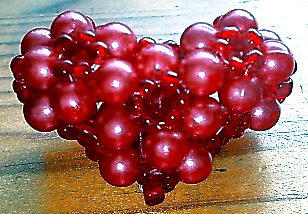
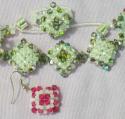
Laura's Red Heart :
Your fellow beader Laura made a beautiful beaded red heart from this tutorial, which is quite admirable considering how challenging it is! If you would like to share your design, email it to me at allegra@3d-beading.com and I'll be more than happy to post it! Here is Laura's description of her red heart:
Materials : I used approximately 1.5 metres of nylon thread (with plenty to spare at the end which is handy for tightening and tying off), 77x 8/0 red seed beads and 36x 5mm pinky-red round beads. (I'm not sure exactly what the 5mm beads are as I've had them quite a while and they weren't in their original packaging).
Time Spent : Altogether, the heart took me around 2 to 3 hours to make and I made it slightly differently from Allegra's, as the bottom bead is a small bead instead of large.
Inspiration : I've wanted to have a go at making a heart for a while but struggled to get the shape right so I was thrilled to find a pattern on this site. Most of my beads are seed beads and are similar in size but I managed to find a small pack of red 5mm beads which I decided to use along with some red seed beads. I'm also going to buy some charm straps so that I can make it into a keyring or mobile phone charm!
| Beader Comments: | |||
| There are currently no comments for this page. Add your comment today! |
