
Beading Market
Shop for beadwork made by your fellow beaders at the 3D-Beading.com Beading Market!


Welcome to the 3-D beaded hello kitty pattern instructions! If you have any difficulty following this tutorial, please post a comment at the bottom of the page on which you are stuck, and I'll do my best to help! Continue to page 5 for the latest pattern by Lucy (which contains diagrams).
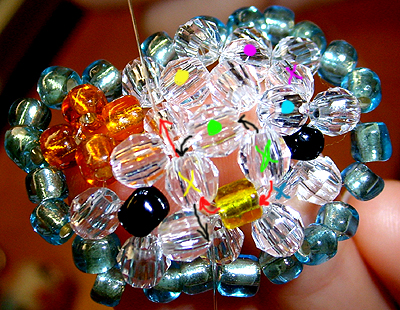
Step 1 : Now follow the end of the fishing line depicted by the black arrow from out of the transparent bead marked by the green X, through the transparent bead marked by the green dot, which is already present in the pattern. Then follow the end of the fishing line depicted by the red arrow from out of the transparent bead marked by the green X, through the all-yellow bead (the nose), which is already present in the pattern. Finally, add the last bead of the top side of the hello kitty, the transparent bead marked by a yellow X (this is a new bead to be added, not already in the pattern), and cross it with both ends of the fishing line. You're almost done the top half of the pattern now!
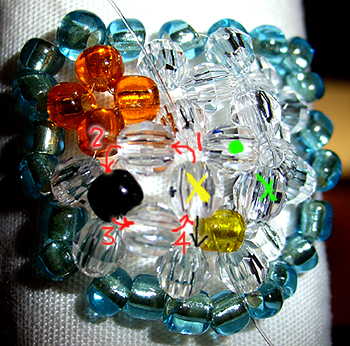
Step 2 : This is the last step to complete the top side of the hello kitty pattern. You must simply join the 4 beads that you see the red arrow circling through in the picture. This is because those 4 beads, although they are connected with all the other beads in the pattern right now, and although they are in the right orientation with respect to each other, they are not actually connected with each other yet. So, you don't even need to touch the end of the fishing line depicted by the black arrow. Only take the other end of the fishing line (red arrow) that is coming out of the top of the transparent bead marked with a yellow X. Take it through the top transparent bead (step 1 in diagram), then through the black bead (the eye) (step 2 in diagram), then through the bottom transparent bead (step 3 in diagram). Finally, lead the fishing line back through the transparent bead labelled with the yellow X, approaching it from below. This is called a self-cross, because you essentially made a circle of beads and crossed to complete it, but only using 1 end of the fishing line, without touching the other end.
Step 3 : Here we see the bottom side of the hello kitty pattern starting to be filled in. How, you ask? The exact same way as the front (so just repeat the whole procedure over again the exact same way on the back). The only difference is that all the blue beads are already in the pattern, so don't add any new blue beads to the pattern when doing the back. You shouldn't be adding a single new blue bead. Just add all new transparent beads, a new yellow bead for the nose, and two new black beads for the eyes. So, how do you make the cicles containing blue beads on the back side? Just go through the blue beads that are already in the pattern with your two ends of fishing line, and all the other new beads. Easy, right? So go ahead and try to fill in the back of the hello kitty now. Oh, and if you're not sure how to get the ends of the fishing line back to the blue bead border of the hello kitty pattern to start on the reverse side, just string them through the beads along the way until you reach the border of blue beads. It's easy! You can change position anytime like that. Just keep stringing through beads until you get where you want to go. Make sure when you reach your destination that you have "crossed" a bead with both ends of the fishing line, because you always want to work with them coming out of the same bead in opposite directions. Also, be careful you don't string through the same bead too many times, because they do not expand to fit more fishing line inside them. Pretty soon the interior of the bead gets full! Use a needle to help you if you have trouble. Generally, even if it seems hopeless, it's still possible to string bead if you struggle with it! Now, before you finish this step, look below to see what you have to do before closing up the back of the hello kitty pattern.
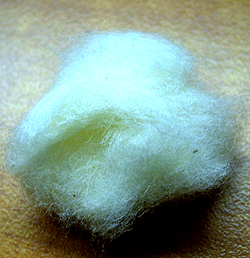
Step 4 : So, you're almost done, but before closing up the back of the hello kitty pattern, be sure to insert a small piece of cotton into the hello kitty between the front and back layers of beads. This will puff up the hello kitty and render her opaque. It will fill in all the void space in your pattern nicely.
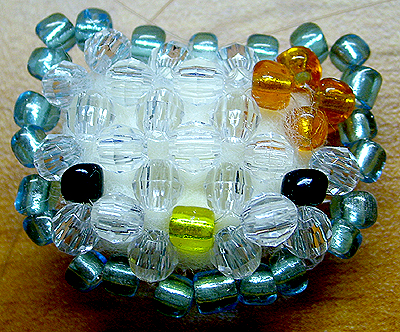
Step 5 : Here you see the finished hello kitty with the cotton inside! Nice! How do you finish off the fishing line? Just tie a few knots over each other at the point where you finished it and then string both ends through a few beads, then cut them short, so that they are not visible. If you want to attach a metal ring at the top so that you can wear it as a pendant, then before cutting off the ends of fishing line, string them through all the beads until you get them to the top, then tie them through a metal ring as you tie your knot several times, then string them through a few beads and cut them short. It's easy! And if your fishing line got too short at some point in the process of making the hello kitty pattern, then what you do before they get too short to work with is string them through beads until they meet each other and tie a few knots. Then string each end through a few more beads and cut them short. Then start a new fresh fishing line piece by stringing it through at the point where you last ended off. Just pass the new piece through one of the beads you were working on, and keep going! It's easy!
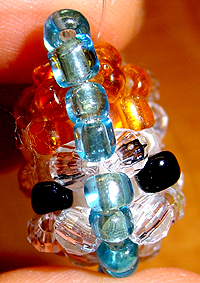
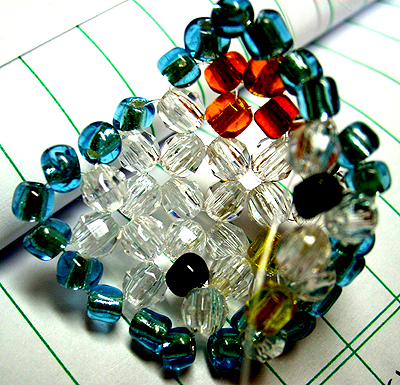
Step 6 : And if you weren't sure what I meant by "fill in the back of the kitty", here's the finished product from the side view. See what I mean now? It's 3-D! And the front and back are identical. Only the blue border of beads is in common with both sides of the hello kitty pattern. And of course, you can use any colours you like for this kitty. Good luck!!
| Beader Comments: | |||
| There are currently no comments for this page. Add your comment today! |
