
Beading Market
Shop for beadwork made by your fellow beaders at the 3D-Beading.com Beading Market!
Welcome to the Inkscape beading diagram tutorial! If you have any difficulty following this tutorial, please post a comment at the bottom of the page on which you are stuck, and I'll do my best to help!
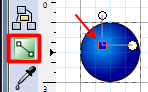
E) Do this step if you applied a gradient fill to the ellipse only. If you applied a solid fill, don't do this step. If you have applied a gradient to the ellipse, click the gradient tool, which is the second tool from the bottom in the left toolbar, and looks like a line with two squares on either end. In my screenshot, it is shown in a red box (there's no red box in the program LOL!). Click to select this tool. Then, as in my screenshot, you should see an L-shaped line show up, with a square at the corner, and two circles on the two ends. The circles control the angle of the gradient, and the square controls the center point of the gradient (ie, where the starting point is located). As you can see in my screenshot, I have dragged the square from the center to the top left of the ellipse (slightly). Do the same thing by simply dragging the square with your mouse. This will create a more realistic-looking bead, with an off-center gradient. If you don't care to have your beads looking this shiny, this step can be omitted! Let's just call this the perfectionist's step.
We're done drawing the ellipse!! Now to duplicate it to make as many beads as we need in the diagram.

2) Select the ellipse using the selection tool (arrow-shaped top icon in left toolbar, which we have used before). Do one of the following to duplicate the ellipse:
-- Either click the Duplicate button, located in the top toolbar, and looks like two overlayed blank gray squares (circled in red in screenshot)
-- Or use keyboard shortcut Ctrl D
-- Or go to Edit >> Duplicate
Duplicate the ellipse several times to get us started. If you need more of them, you can always duplicate more copies later.
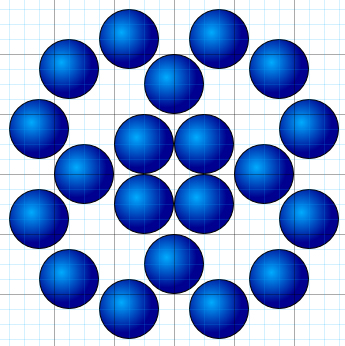
3) Drag your ellipses to where you want them to go on the grid. Remember that all your ellipses are located in your starting square until you drag them away one by one using the selection tool. This is the easiest part of the diagram!! To draw our prototypical diagram, your diagram should now look like the one in my screenshot. Take note of the positions of the ellipses relative to the grid lines.
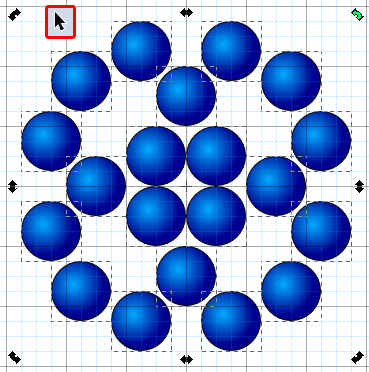
4) Now that our ellipses are drawn on the grid, we may optionally rotate them all together if our diagram so requires (in order to replicate the diagram initially drawn by Laura, we need to rotate). What you do is click on the selection tool (black arrow icon in left toolbar, and shown in my screenshot in a red box). With the selection tool, drag across all ellipses to select them all (they should all be surrounded by dashed lines when selected). You should also see 8 black arrows around all the ellipses. These are the resizing arrows. We want to see the rotation arrows, so to do that, click once with the mouse somewhere on one of the ellipses. The 8 resizing arrows will turn into 8 rotation arrows, as shown in the screenshot. The arrow that is labelled in green is the one I was dragging to rotate the ellipses as a unit. To constrict the angle of rotation to snap to the grid, hold down the Ctrl button as you drag with the mouse from the green arrow. Rotate until the image is rotated by 45 degrees.
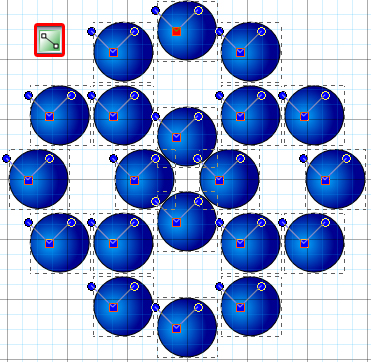
5) After rotating the ellipses, the gradient center point will no longer be in the right corner of the ellipses. Fixing this is easy. Click on the gradient tool button (which is boxed in red in my screenshot). You will see all the gradient squares and circles on each ellipse. We want to select them all and move them as a unit, to avoid having to adjust each ellipse gradient separately. To do this, do one of the following:
-- Either hold down the Shift key while dragging with the gradient tool across all ellipses
-- Or press keyboard shortcut Ctrl A (which is the keyboard shortcut for select all)
Now that all gradients are selected, the squares and circles should turn blue from white. Now all you have to do is click on one of the squares with your mouse (in my screenshot, you can see that I clicked on the top one because it's red) and drag the square to the right place in the ellipse (the top left corner was where we had it before). All squares in all ellipses should adjust in unison. This step is probably over the top in terms of perfectionism, but I included it to teach you about the program's capabilities.
