
Beading Market
Shop for beadwork made by your fellow beaders at the 3D-Beading.com Beading Market!


Welcome to the beading techniques instruction pages! If you have any difficulty following these beading techniques, please post a comment at the bottom of the page on which you are stuck, and I'll do my best to help!
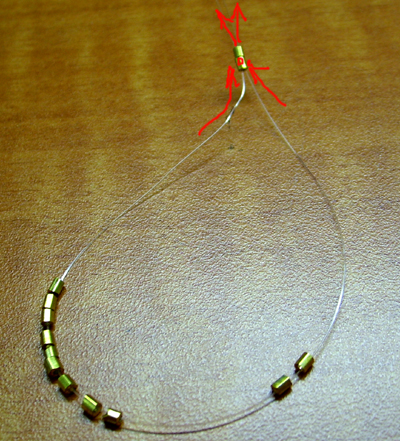
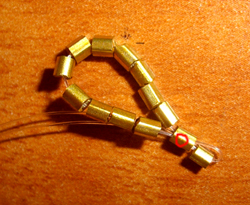
Step 1 : The cross is the most commonly used beading technique for the patterns on this website, but there are other very useful variations on it that should come in handy more often than you might think. Here I will show you the uni-directional cross (I invented these names LOL), where both ends of the fishing line are strung through the same bead in the same direction. In the picture, we see that the gold beads have been strung through the fishing line as usual and the two ends are both being strung through the last two beads in the same direction, as indicated by the red lines.
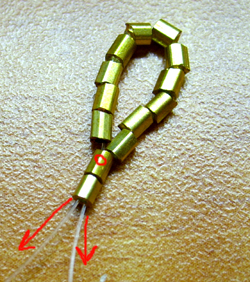
Step 2 : Now we simply pull tight on the two ends of the fishing line through the last two beads, and make sure as usual that the two ends of the fishing line are of equal length (ie, that the beads are centered on your fishing line). Note the red circle on the same bead throughout this tutorial, so help you follow along. It is the second last bead that was added, which is included in the uni-directional cross, in contrast to the simple cross shown in page 1.
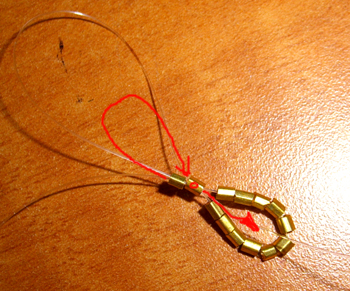
Step 3 : In this step, take one of the fishing line ends and turn it back around, skipping the outer bead and stringing it through the inner bead that is labelled with a red circle. You should be stringing through that bead in the opposite direction that you strung through it in the previous step. Now repeat this exact same step with the second end of the fishing line (exactly the same way, through the same bead with the red circle on it).
Step 4 : The end result is that the bead on the point (the bead you skipped over with the fishing line) is trapped and you now have achieved a pointy end! If desired, you can string the fishing line ends through the remaining gold beads in the circle to hide them, and also to change their location (recall that you change the location of the fishing line ends by stringing them through beads until you reach the new location of interest and continue adding beads there). Now, instead of doing this technique with both ends of the fishing line, it's also totally possible to do it with only one end of the fishing line and leaving the other end out entirely. Then you can rejoin the two ends together by either tying a knot or crossing a bead using the beading technique shown on page 1 of these instructions.
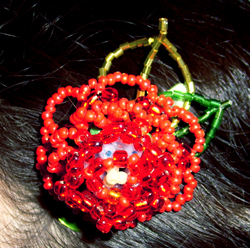
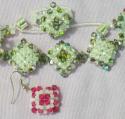
Step 5 : And there you have it! Some examples of where this technique would be of use to you in your beadweaving is making beaded leaves, petals of flowers with pointy petals (eg sunflowers), tails of fish and mermaids, wings of birds, pointy ears (eg rabbits), etc. I've seen this technique used in all sorts of applications. Be creative and try things out! This website is only a guide to teach you how to beadweave and suggest some examples. The possibilities are endless! (I invented the flower pattern you see to the left. It's a hairclip that I'm wearing in my hair! The technique shown on this page was applied to the leaves you see under the flower).
